
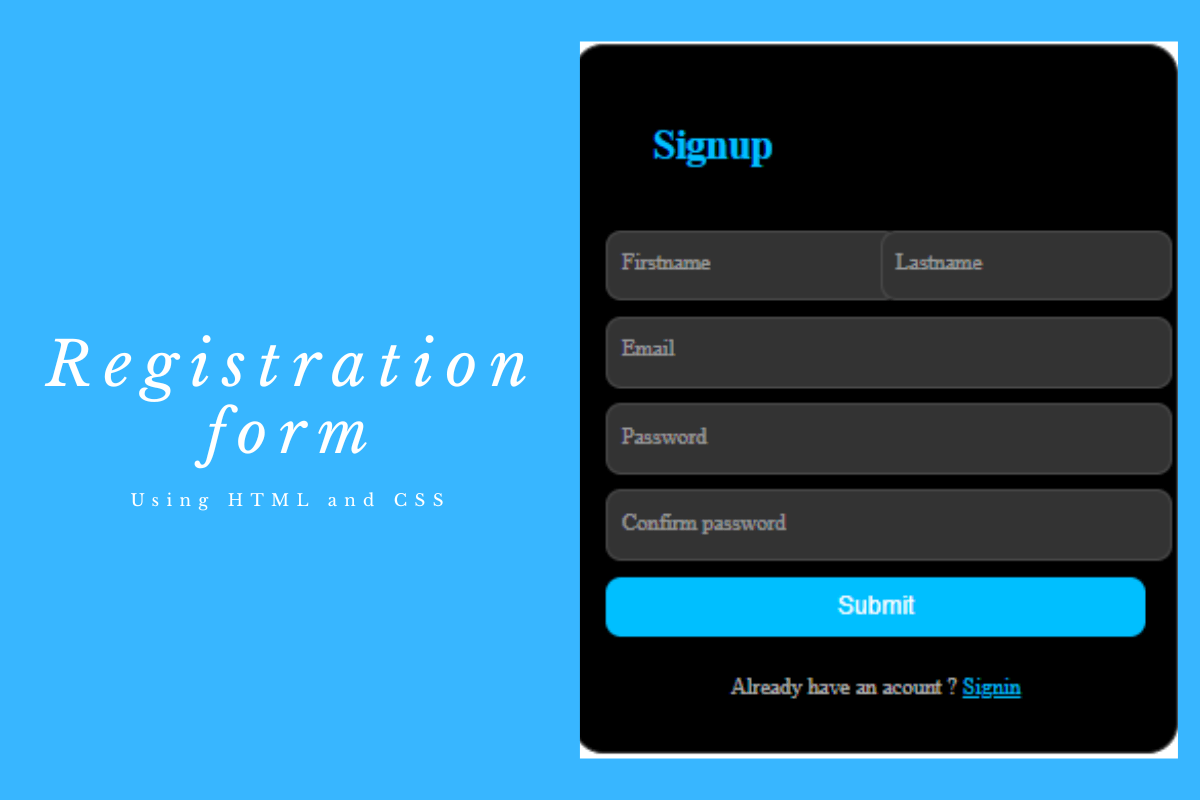
Looking for an easy way for users to sign up on your site? A registration form handles that. In this tutorial, you will learn how to create a registration form from scratch using HTML and CSS. It gathers fundamentals such as name, email, password, and so on, all designed to appear great on the desktop and mobile.
How to Create Registration Form with HTML and CSS
Step 1: Create a Project Folder.
Create a new folder called “registration-form.” Inside the folder, create two files:
- index.html – This will contain the HTML markup
- style.css – This will hold your CSS styling
Step 2: Build HTML Structure
Add the HTML code to your index.html file. The code includes an essential HTML markup with different sematic tags like <form>, <div>, <label>, <input> section with the class “container.” Inside, put a header and a form. Use divs for input groups, labels, and inputs.
index.html
<!DOCTYPE html>
<html lang="en">
<head>
    <meta charset="UTF-8">
    <meta name="viewport" content="width=device-width, initial-scale=1.0">
    <title>Registration Form - HTML CSS</title>
    <link rel="stylesheet" href="style.css">
    <link href="https://fonts.googleapis.com/css2?family=Poppins:wght@200;300;400;500;600;700&display=swap" rel="stylesheet">
</head>
<body>
   <!-- From Uiverse.io by ammarsaa -->
<form class="form">
    <p class="title">Register </p>
    <p class="message">Signup now and get full access to our app. </p>
        <div class="flex">
        <label>
            <input class="input" type="text" placeholder="" required="">
            <span>Firstname</span>
        </label>

        <label>
            <input class="input" type="text" placeholder="" required="">
            <span>Lastname</span>
        </label>
    </div>

    <label>
        <input class="input" type="email" placeholder="" required="">
        <span>Email</span>
    </label>

    <label>
        <input class="input" type="password" placeholder="" required="">
        <span>Password</span>
    </label>
    <label>
        <input class="input" type="password" placeholder="" required="">
        <span>Confirm password</span>
    </label>
    <button class="submit">Submit</button>
    <p class="signin">Already have an acount ? <a href="#">Signin</a> </p>
</form>
</body>
</html>
Step 3: Add CSS Style
Now add CSS code to your style.css file to style your registration form.
style.css
body{
  display: flex;
  justify-content: center;
  align-items: center;
  height: 100vh;
 }
.form {
  display: flex;
  flex-direction: column;
  gap: 10px;
  max-width: 350px;
  padding: 20px;
  border-radius: 20px;
  position: relative;
  background-color: black;
  color: #fff;
  border: 1px solid #333;
}

.title {
  font-size: 28px;
  font-weight: 600;
  letter-spacing: -1px;
  position: relative;
  display: flex;
  align-items: center;
  padding-left: 30px;
  color: #00bfff;
}

.signin {
  font-size: 14.5px;
  color: rgba(255, 255, 255, 0.7);
}

.signin {
  text-align: center;
}

.signin a:hover {
  text-decoration: underline royalblue;
}

.signin a {
  color: #00bfff;
}

.flex {
  display: flex;
  width: 100%;
  gap: 6px;
}

.form label {
  position: relative;
}

.form label .input {
  background-color: #333;
  color: #fff;
  width: 100%;
  padding: 20px 05px 05px 10px;
  outline: 0;
  border: 1px solid rgba(105, 105, 105, 0.397);
  border-radius: 10px;
}

.form label .input + span {
  color: rgba(255, 255, 255, 0.5);
  position: absolute;
  left: 10px;
  top: 0px;
  font-size: 0.9em;
  cursor: text;
  transition: 0.3s ease;
}

.form label .input:placeholder-shown + span {
  top: 12.5px;
  font-size: 0.9em;
}

.form label .input:focus + span,
.form label .input:valid + span {
  color: #00bfff;
  top: 0px;
  font-size: 0.7em;
  font-weight: 600;
}

.input {
  font-size: medium;
}

.submit {
  border: none;
  outline: none;
  padding: 10px;
  border-radius: 10px;
  color: #fff;
  font-size: 16px;
  transform: .3s ease;
  background-color: #00bfff;
}

.submit:hover {
  background-color: #00bfff96;
}

@keyframes pulse {
  from {
    transform: scale(0.9);
    opacity: 1;
  }

  to {
    transform: scale(1.8);
    opacity: 0;
  }
}
Step 4: Preview Your Registration Form
Open your index.html file in a browser or use the Live Server extension in VS Code to see your styled registration form in action.
Conclusion
You’ve just created a simple registration form using only HTML and CSS. This form is accessible, responsive, and ready to be integrated into any website or project. By following this guide, you have successfully created a modern and stylish registration form.
Also check: How to Create a Simple Login Form